A while ago my colleagues and I needed a slider control on a web dashboard. A team of students was assigned to build the entire UI, but they did not quite succeed. A third party front-end developer eventually delivered the dashboard, yet without the sliders. Since I may still need it in future IoT projects, I made an attempt by myself, loosely inspired by the IPI dew point calculator.
Note that in most cases <input type="range"> in HTML5 will suit your needs. However we’re tinkering and will need some customizations in the future.
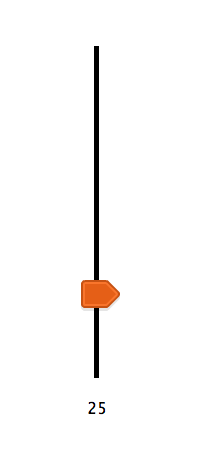
Let’s keep the appearance minimalistic for now. It is easy to extend the control with a fancy background or multiple thumbs to set a range instead of a single value. This is what we are aiming at:
The thumb image is publicly available from a UI pack by Kenney. All sources for this slider are on GitHub.
The HTML contains two divs for the slider (the track element and the thumb) and one to display the value. At the end of the body the JavaScript is initialized.
index.html
<!DOCTYPE html> <html> <head> <title>Vertical Slider</title> <meta charset="UTF-8"> <meta name="viewport" content="width=device-width, initial-scale=1.0"> <link rel="stylesheet" href="main.css" /> <script type="text/javascript" src="main.js"></script> </head> <body> <div class="slider" id="demo-slider"><div class="thumb" id="demo-thumb"> </div></div> <div class="value" id="demo-value">0</div> <script> init(); </script> </body> </html> |
We set some styling and positioning in CSS. The thumb image is positioned right at the bottom of the track element. This element has vertical line as the left border, which determines its visual appearance.
main.css
.slider { border-left: thick solid #000000; height: 332px; position: absolute; left: 120px; top: 75px; } .thumb { cursor: pointer; position: absolute; left: -18px; top: 317px; width: 39px; height: 31px; background-image: url("thumb.png"); } .value { position: absolute; left: 83px; top: 430px; width: 80px; text-align: center; font-family: "Lucida Console", Monaco, monospace; } |
In JavaScript a constructor is used to create a slider instance:
main.js
function init() { slider = new Slider(0, 100, document.getElementById("demo-slider"), document.getElementById("demo-thumb")); slider.setValue(25); } |
In this instance we keep track of the slider state. We also define some callbacks to handle mouse events. When the thumb is clicked mouse movement is tracked to update the slider value. When the button is released tracking stops.
function Slider(min, max, element, thumb) { this.min = min; this.max = max; this.value = min; this.element = element; this.thumb = thumb; sliderInstance = this; shift = thumb.offsetHeight / 2; mouseDownCallback = function (evt) { var thumbYOffset = evt.clientY - thumb.offsetTop; mouseMoveCallback = function (evt) { var yRange = element.offsetHeight; var y = Math.max(0, Math.min(yRange, evt.clientY - thumbYOffset)); thumb.style.top = y - shift + 'px'; sliderInstance.value = max - y / yRange * (max - min); sliderInstance.onChange(); evt.preventDefault(); }; mouseUpCallback = function (evt) { document.removeEventListener('mousemove', mouseMoveCallback, false); document.removeEventListener('mouseup', mouseUpCallback, false); }; document.addEventListener('mousemove', mouseMoveCallback, false); document.addEventListener('mouseup', mouseUpCallback, false); evt.preventDefault(); }; thumb.addEventListener('mousedown', mouseDownCallback, false); } |
To interact with the slider, getters and setters are added to the prototype.
Slider.prototype.setValue = function (value) { value = Math.max(this.min, Math.min(this.max, value)); var yRange = this.element.clientHeight; var y = Math.floor((this.max - value) / (this.max - this.min) * yRange); this.thumb.style.top = y - shift + 'px'; this.value = value; this.onChange(); }; Slider.prototype.getValue = function () { return this.value; }; Slider.prototype.getId = function () { return this.element.id; }; |
A function handles slider value changes to update the value element:
function onSliderChange() { // We can use this.getId() to identify the slider document.getElementById("demo-value").innerHTML = this.getValue().toFixed(0); } |
So we add it to the slider after we created it (or to each slider if we have more than one):
function init() { slider = new Slider(0, 100, document.getElementById("demo-slider"), document.getElementById("demo-thumb")); slider.onChange = onSliderChange; slider.setValue(25); } |
